When I first wrote about Ridge Racer 6, I was focused on the completion of the game, on climbing the Australian Achievements leaderboards. That task complete, and daunted by the final remaining Achievement, I left Ridge Racer 6 alone for a few months.
I still spoke readily of my love for the game, however; and a bunch of other members of the Way Of The Rodent forums agreed with me. We’d congregate on Xbox Live occasionally (often necessitating a 5am alarm-inspired wakeup on a Saturday morning) and have an absolute ball. We were all bullish of the quality of the game; so much so that Ridge Racer 6 won the Way Of The Rodent Game of the Year for 2006.
And that felt very personal to me; I felt that, in some small way, I helped steer that Award to that great game. Ironic, then, that my piece on Zelda: Twilight Princess was selected to represent that game in the Rodent Awards issue.
Anyway, as homage to Ridge Racer 6 (and also because another chap on the forum expressed a passing interest) I decided to tackle that final Achievement.
The Impossible Achievement.
(Now, we all know that’s not literally true. There’s a ton of Achievements that are obviously more difficult – Mutant Storm Reloaded‘s Black Belt Grandmaster, and Robotron‘s Wave 100 spring to mind – but a quick perusal of many forums devoted to reveals the reluctance with which many approach this final Achievement.)
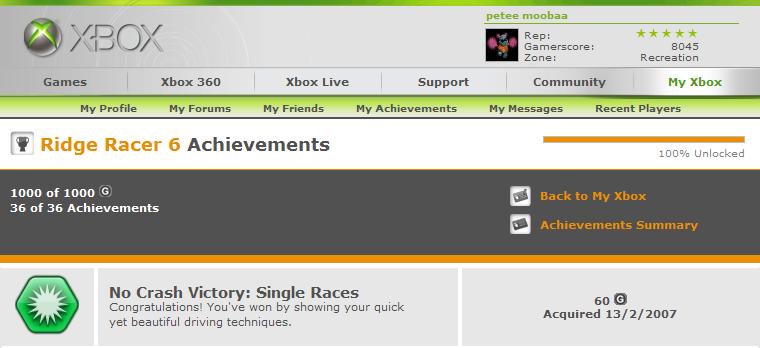
No Crash Victory: Single Races.
Win every race on each track (fifteen tracks plus their reverses) in every Class (five Classes) without hitting anything – other cars, scenery. “No Crash” is a bit of a misnomer; it’s commonly referred to as “No Collisions”, or “The Impossible Achievement.”
So – I started this task, unsure how long it would take – or if it was even possible (for me). I swore upfront that I was completely unable to even make it around some tracks in Class 4 without scenery collisions, let alone worrying about other cars. But, over time, I learnt some tricks, noticed some aspects of the game that weren’t immediately apparent, and… I Achieved :)
I’ve not idea how long it took to complete this Achievement, but I’ll hazard a guess and say it was 40-45 hours. And, as a service to my zero readers, I’m listing my notes here – if only to assure them that this isn’t as impossible as some would have you believe.
And so, in some semblance of order of importance:
- Use Unlimited Nitrous. You’re already undertaking a heroic task; there’s no reason to attempt to be super-human. Unlimited Nitrous (unlocked somewhere within World Xplorer, and activated on the Car Select screen by hitting “Y”) gives you one huge advantage: it allows you to drop a double-nitrous on the start line. This, along with some artful dodging, can get you a third of the way through the field within seconds.
- Change your viewpoint. Since I was the only person in the universe that doesn’t race with the in-car view, it pays to mention this: change to the chase-cam viewpoint (prod “X”). It really helps you judge your margins of error, as well as adding the teeth-gritting joy of squinting at the screen looking for those polygons of air that separate you from your foes.
- Learn to take the pedal off the metal. I know it sounds weird, completely at odds with the Ridge Racer ethos, but sometimes you just have to slow down. I’ll be honest: I’d never used the brake (what? There’s a brake?) prior to Class 4 of The Impossible Achievement… but some tracks will require that you not be flying around at StupidSpeed (either use the brake, or just don’t hammer the accelerator all the way down) to avoid hitting walls; learn to deal with it.
- Learn to use The Groups. You may have noticed that computer-controlled cars tend to hang around in Groups; these prove to be ultra-useful when attempting the No Collision challenge. In-between Groups there are little Safety Zones; once you successfully overtake a Group and get to the Zone, cars behind you are unlikely (note the careful choice of word, there) to try and overtake you by using Nitrous. There tends to be a Safety Zone around 8th or 9th place, often 4th, and 2nd; this varies depending on the course and initial layout of the opposition cars.
- Use your strengths. Your Nitrous has far greater grunt than the oppositions. If the car you’re attempting to overtake deploys a Nitrous – even if it’s a triple – don’t be afraid to fire your own Nitrous; you’ll overtake them no problems, just make sure you can get sufficiently clear of their Nitrous-fuelled ramming after yours runs out.
- Don’t Rush. Use the above two tips to your advantage… don’t try to overtake every car from the start line. Often you can use a double-Nitrous (combined with a Rocket Start) at the start of a race and settle nicely into the first Safety Zone (around 8th or 9th position), but don’t feel compelled to do so. Some tracks are easier if you let the opposition have ten seconds head start; if you’ve got Unlimited Nitrous, you can catch them back up no problems. Take your time, stalk your foe – you’re in no big rush. Remember – all you have to do is win. Without hitting anything ;)
- Traffic patterns matter. It’s pretty easy to notice that Restarting a race in progress (hitting Start > Restart) doesn’t change the opposition cars makeup or locations. You might also notice that, if you drive exactly the same way, overtaking cars on the same side every time, that the race will pretty much pan out in an identical manner. This is really handy – it allows you to scope out paths through the traffic, and the reactions of different cars to various behaviors. If you bugger up – hit a car, get rammed, or just nick a wall – you can just restart the race and try again. In this manner, you can gradually pry your way through the puzzle that each race presents.
- Random cars? Not quite. A corollary to the above note is that, while Restarting a race leaves opposition car patterns intact, quitting to the Single Race Menu and starting the race again from there creates a random car layout. This isn’t strictly true; each track seems (in Special Class, anyway) to have a selection of general patterns it will use to initially order cars. Thus, if there’s a pattern you want to return to, repeatedly Quit back to the Single Race Menu and start the same race until it returns.
- Some cars really want their position. Another variant of the Pattern rules: some cars really want to be in a particular position. Through some vagaries of racing, you might see a car you normally expect to see in second place (for example) pushed way down the field – watch out! To get to its preferred position, it’ll boost and bash its way through traffic with scant regard for your Achievement gathering. It doesn’t happen all the time, but it’s really annoying to find a car that acts like this.
- Beware the Leader’s Triple. The computer-controlled frontrunner will always fire off a triple-Nitrous when challenged. This can be a complete bastard to deal with whilst overtaking, so the trick is to milk it. Get right up the leading car’s arse and it’ll fire off the triple; keep in close proximity to the car and overtake when the triple runs out. It appears that each computer-controlled car can only manage one triple per race… which is nice.
- Mild Drift rules. I’ve said it before – I’m a complete pussy at this game, so I chose to perform all my races using Mild Drift cars – the Wild Gang (Class 1 & 3) and the Eo (Class 2 & 4). The Mild Drift gives you extra time to correct your slides, not to mention allowing you to actually face the direction you intend to travel in for the majority of the time. As for Special Class, I used the Bass Cruiser… just kidding, what am I, a fucking idiot? Angelus all the way.
- Have a Plan-Of-Attack. At first, I thought that I’d tackle the races one-track-at-a-time. I reasoned that it was best to focus on the track – learn every bump, every curve, every nuance, every drift point. I wound up having struggling through every Class on every track, until I hit the fourth track – Island Circle. Or “Island Fucking Circle,” as it became known. So I changed my POA – I focused on completing one Class at a time, starting with Class 1. The advantage to this approach was that I quickly became accustomed to the danger cars and approaches of each Class; it often meant that, once I hit the Reverse tracks, I was so attuned to the cars that I would win races easily. Or rather, more easily.
- Don’t worry, it gets easier. Really, it does. Class 1 is tricky and tedious, a real test of concentration – after all, races can last five minutes, and one short daydream is enough to see you careening into a wall. Class 2, perhaps because of the additional speed, feels significantly easier; Class 3 is noticeably more difficult (due to the extra speed), and Class 4 only a touch trickier. Surprisingly, Special Class felt easier(!) than Class 4 for the most part… and, more importantly, the Special Class races are genuinely fun – I would literally speed-sweat bullets for the 180 seconds of some races. And maybe it was delirium, but there were times when an angry Terrajin rammed me going into the final corner and I’d giggle like a drunk schoolgirl. Then swear a lot, restart the race, ram the bastard off the road, and feel much better.
Don’t get me wrong, it’s still a massive undertaking – but it’s definitely not impossible. Hey, if I can do it, anyone can :)